The Paul Robeson tomato is an heirloom variety that is as unique as it is delicious. It has dark purple skin that is almost black and a rich taste and a finish that’s reminiscent of nights spent around a campfire.
While it isn’t necessarily one of the most well-known heirloom tomatoes, I think it’s worth adding to your garden for its flavor alone.
We’re going to provide some more information about the Paul Robeson tomato so you can decide if you’re interested in growing it. Then we’ll cover care tips including selecting seeds, plant spacing, watering, fertilizing, and more.
Paul Robeson Tomato – Quick Growing Guide
| Plant Type: | Annual vegetable | Tolerance: | Cool temperatures |
| USDA Hardiness Zone: | 4–9 | Maintenance: | Moderate to high |
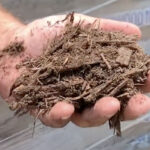
| Season: | Summer and early fall | Soil Type: | Rich and well-aerated |
| Exposure: | Full sun | Soil pH: | 6.2 to 6.8 |
| Time to Maturity: | 80–90 days after transplant | Soil Drainage: | Well-draining |
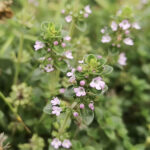
| Spacing: | 24 inches | Companion Planting: | Lettuce, basil, beets, sweet alyssum, marigold |
| Planting Depth: | 1/4 inch deep | Don’t Plant Near: | Potatoes, peas, pole beans, corn |
| Height: | 6–8 feet | Family: | Solanaceae |
| Spread: | 2–4 feet | Genus: | Solanum |
| Water Needs: | Moderate | Species: | lycopersicum |
| Common Pests and Diseases: | Aphids, thrips, late blight, early blight, septoria leaf spot, anthracnose | Cultivar: | Paul Robeson |
The History of the Paul Robeson Tomato
The exact origins of the Paul Robeson tomato are somewhat uncertain, but it is believed to have been introduced to the United States by Russian seed collector Marina Danilenko.
It is named after the famous African American athlete, actor, and civil rights activist, Paul Robeson, who was known for his powerful and resonant voice. While Robeson was known around the world, he was especially appreciated in the former Soviet Union.
In recent years, the popularity of the Paul Robeson tomato has continued to grow, and it is now widely available from seed companies and specialty nurseries. Its rich history and unique qualities make it a popular choice for home gardeners and chefs alike, and it is likely to remain a favorite for many years to come.
About the Paul Robeson Tomato: Color, Size, and Taste
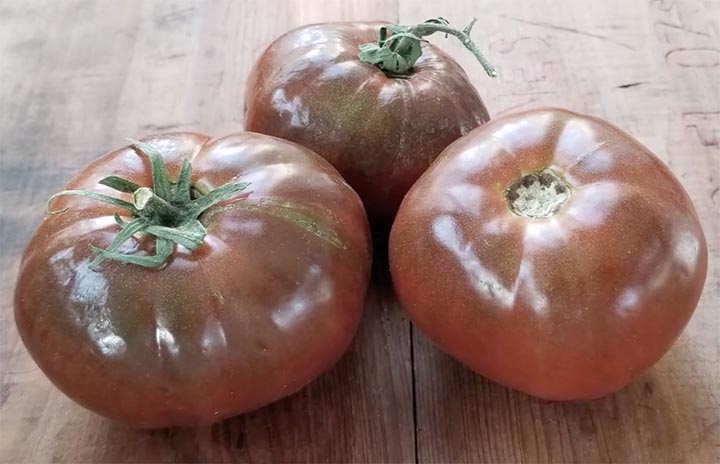
The Paul Robeson tomato is known as a black tomato. While the fruit’s skin isn’t quite black, it is a deep maroon with dark green shoulders.
The fruits are medium to large in size and typically weigh between 8–16 ounces. When you slice into the fruits, you’re met with a deep red color and a smooth interior surrounded by jelly-filled seed pockets.
The tomatoes have a balanced taste that combines sweetness and acidity. However, these tomatoes separate themselves from other varieties due to their blend of nuanced yet complex undertones that range from smokey to rich to woodsy.
In 2001 and 2002, the Paul Robeson tomato won “Best of Show” at the TomatoFest tomato tasting in Carmel, CA.
Where to Buy Paul Robeson Tomatoes
Although this variety has grown in popularity in the past twenty years, it still isn’t quite as popular as heirloom tomatoes like the Cherokee Purple and Brandywine. That means it can be difficult to find seedlings in big box stores and smaller greenhouses.
However, you can find Paul Robeson seeds online and start your own seeds. Some trusted seed sources include TomatoFest, Totally Tomato, and Southern Exposure Seed Exchange.
Growing Paul Robeson Tomatoes from Seed
Since this variety of tomato can be difficult to find in seedling form, you may need to start your own plants from seed. But don’t worry—this can be a fun and rewarding process!
First, you’ll need to make sure you start your seeds at the right time. Paul Robeson tomato seeds can be started indoors 6-8 weeks before the last expected frost date in your area. This will give your plants a head start and ensure that they are ready to transplant into the garden when the weather warms up.
Next, you’ll need to gather your supplies. While there are multiple ways to start tomato seeds indoors, I recommend the following items.
- High-quality seed starting mix like Vermont Compost Fort Fee or Coast of Maine Spout Island Blend.
- Smaller cell seed-starting trays to start your seeds in.
- Larger 4-inch pots that can support plants as they grow.
- A heating mat to warm the soil and allow for strong germination.
- Grow lights to provide the seedlings with bright light indoors.
Once you’ve got your supplies ready, it’s time to plant your seeds!
Start by adding water to your potting mix so it is damp but not dripping wet. Use this mix to fill your seed-starting trays.
The goal is for the cells to be full but not compacted. I like to fill my trays, gently tap them on a table, and then refill the space that tapping has created.
Next, use your finger to create a ¼-inch indent in each cell. Place one tomato seed in each hole, cover it with soil, and water the soil well.
Place the seedling trays on the heat mat. They should germinate and emerge from the soil in 4–7 days.
Once the seedlings emerge, place them under the grow lights. Ensure that the grow lights are only a few inches above the tops of the plants.
Keep the soil moist but not soaking wet. You can also place a gentle fan on the plants to prevent mold from developing and also to strengthen the plants.
When the seedlings begin to outgrow their small containers, you should move them up into the larger 4-inch pots. I find that this potting-up process often occurs about a month after planting the seeds.
Once the seedlings are about 4 inches tall, they’re ready for the garden!
How to Plant Paul Robeson Tomatoes Outdoors
No matter if you grow your own tomato seedlings or manage to purchase Paul Robeson plants from a nursery, it’s important that you prepare these plants for life outdoors.
Most seedlings have spent their life in an environment that has coddled them—consistently warm temperatures, little wind, a perfectly-crafted potting mix. While these factors have allowed the seedlings to thrive, their outdoor home will be quite different.
Rather than moving the tomato plants straight from their cozy indoor home to the harsh outdoors, you should allow them to slowly adjust to their new environment. Start by moving the plants outdoors for a few hours then increase their time spent outside until they spend 24 hours outdoors.
At this point, the plants are ready for their new home!
That said, you’ll need to make sure the weather is favorable for tomato plants. The temperatures need to be above freezing, and I like nighttime lows to remain above 50ºF.
If you’re planting multiple Paul Robeson plants, provide two feet of space between each plant. You can plant smaller plants like beets, lettuce, and sweet alyssum a foot away from the tomato plants.
Dig a hole that is about eight inches wide and eight inches deep and put a handful of finished compost in the bottom of the hole. Place a seedling in the hole and then fill in the empty space with soil.
It’s okay if a bit of the plant’s stem is under the soil surface—lateral roots will develop from these buried portions. Just make sure that at least four inches of the plant is above ground.
Caring for Paul Robeson Tomatoes
After your plants are in the ground, it’s up to you to provide them with the proper care. Keep the following factors in mind to help your plants thrive.
Don’t forget to check out my article on growing heirloom tomatoes in detail.
Watering
Like most types of tomatoes, Paul Robeson tomato plants require a moderate amount of water. In general, they require about two to three inches of water per week.
Rather than applying all this water at once, space your watering out over multiple days. This will keep the soil at a more consistent moisture level which will help prevent fruit cracking and also allow for the movement of nutrients.
Water near the base of the plant and try not to splash the plants with water.
While this may be obvious, you will need to adjust how much water you need to water based on the amount of rain that falls.
Fertilizing
Paul Robeson tomatoes are heavy feeders that require a decent amount of nutrients.
When they are in their vegetative stage of growth, they will need lots of nitrogen as well as smaller amounts of potassium, phosphorus, and other nutrients. Apply a fertilizer designed to support vegetative growth about once every two weeks until the plants are about 18 inches tall.
At this point, you’ll want to switch to a fertilizer that encourages the development of flowers and fruit. This means choosing a product that is higher in phosphorus and potassium than nitrogen—Espoma Organic Tomato-Tone is one good option.
I also like to add a boost of beneficial microbes to the soil to encourage plant availability and uptake of nutrients. You can do this by adding a bit of high-quality finished compost around your plants or adding a formulated blend of microbes.
Trellising
While trellising is technically an optional step—the plants will likely still grow and produce fruit if you don’t trellis—I find it essential. Trellising helps keep the plants contained which frees up space in the garden, prevents some diseases, and makes harvesting easier.
One of the simplest ways to trellis tomato plants is by using metal tomato cages. These will help keep the plants upright and require minimal labor besides placing the cages in the ground.
You can also use other trellising methods such as the Florida stake and weave or overhead trellising with clips.
Pruning
Similar to pruning, you don’t need to prune your Paul Robeson plants. However, doing so can help manage diseases and also make harvesting easier.
If you choose to prune, it’s essential that you start with sharp and clean tools, no matter if that’s a pair of pruning shears or a knife.
Some pruning steps you can complete include removing lower leaves and pruning off excessive leaves. You can also remove the suckers aka the shoots that emerge from between the main stem and leaves.
Managing Pests and Diseases
Paul Robeson plants are susceptible to a wide variety of tomato diseases and pests. Prevention is the most effective way to keep your plants healthy, but proper treatment is the next best course of action.
One way to limit both pests and diseases is by rotating where you plant certain crop families each year. Aim to plant members of the Solanaceae family (tomatoes, peppers, eggplants, and potatoes) in a different location each year.
You should also familiarize yourself with common tomato diseases such as early blight, late blight, anthracnose, and fusarium wilt.
When it comes to pests, maintaining a healthy and diverse environment can often help keep problematic critters in check. Beneficial insects like lady beetles, assassin bugs, and parasitic wasps can help control pests like aphids and armyworms.
However, if you do notice an outbreak of pests, it’s best to treat them ASAP.
Harvesting, Storing, and Eating Paul Robeson Tomatoes
Paul Robeson plants begin to produce ripe fruits about 80–90 days after you transplant seedlings.
Fruits near the bottom of the plant will be the first to ripen. Tomatoes will start small and light green, grow to their mature size, and then begin to change color.
Fully ripe Paul Robeson tomatoes will be dark red. However, they may still maintain dark green shoulders aka the area near where the stem attaches the fruit.
You can harvest Paul Robeson tomatoes as soon as they begin to turn color, or you can wait until they are fully ripe. If you harvest tomatoes partially ripe, you can place them in a cool area (50ºF–60ºF) until they are ripe.
But whatever you do, don’t store your tomatoes in the refrigerator! These chilly temperatures can damage both the tomatoes’ flavor and texture which is not what you want.
When your tomatoes are fully ripe, it’s time to enjoy them! Some of my favorite ways to eat these rich tomatoes include sliced with salt and black pepper, on sandwiches, and in tomato salads.
That said, you really can’t go wrong! While Paul Robeson tomatoes are delicious no matter where you acquire them from, you may find tomatoes that you’ve grown yourself taste extra special.