Tomatoes (Solanum lycopersicum) are grown by more gardeners than any other fruit. Tomatoes are native to Central and South America. They were domesticated in Mexico and there are many wild varieties still in existence.
I have grown tomatoes for many years and these are the things you need to know to get your own tasty tomatoes.
Quick Tomatoes Growing Guide
| Plant Type: | Perennial grown as an annual vegetable | Tolerance: | Varies by Variety |
| USDA Hardiness Zone: | 4–9 | Maintenance: | Moderate |
| Season: | Summer and early fall | Soil Type: | Fertile, well aerated |
| Exposure: | Full sun | Soil pH: | 6.2 to 6.8 |
| Time to Maturity: | Varies, 60-80 days | Soil Drainage: | Well-drained |
| Spacing: | 3 feet | Companion Planting: | Lettuce, basil, beets |
| Planting Depth: | 1/4 inch deep | Don’t Plant Near: | Potatoes, peppers, eggplants |
| Height: | 3-6 feet | Family: | Solanaceae |
| Spread: | 2–4 feet | Genus: | Solanum |
| Water Needs: | Moderate | Species: | lycopersicum |
| Common Pests and Diseases: | Early blight, late blight, Septoria leaf spot, aphids, thrips, tomato hornworms | Cultivar: |
Indeterminate versus Determinate Tomato Plants
Tomato plants are either indeterminate or determinate. You can read our article for the difference between them.
Indeterminate tomato plants continue to grow until they die. The tomatoes from an indeterminate plant come all season. Many beefsteak tomatoes are indeterminate. These plants are also referred to as vining plants.
Determinate tomato plants grow to a certain size and stop growing. The tomatoes come all at once or within about one to three weeks, then the plant dies. Many paste-type tomatoes are determinate. These plants are also referred to as bush plants.
Semi-determinate plants do not grow as large as indeterminate plants but have fruit across the season. They are a good choice if you want lots of tomatoes all season but do not have a lot of room.
Cherry tomato plants can be either indeterminate or determinate but do not grow as large as other tomato types.
How to Care for Tomato Plants
Tomato plants are easy to care for. Here is what they need to grow lots of tasty tomatoes.
Light
Tomatoes need full sun, which means at least six hours of sunlight, with at least eight hours being better.
I have found that tomatoes that do not get enough sunlight are stunted and have few if any tomatoes. The tomatoes the plant does are small and flavorless.
If you’re interested in indoor tomato growing, be sure to check out my article on grow lights for tomatoes.
Soil
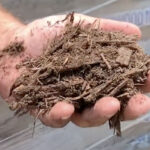
Tomato plants need well-drained, fertile soil. I work three inches of compost into the soil on the row where I am planting my tomato plants.
Do not use raw manure as it has microorganisms that can make you sick and weed seeds that will compete with the tomato plants for nutrients.
The soil pH should be between 6.2-6.8. I use a soil test to tell me the pH and get recommendations for adjusting it if the pH is not in the ideal range. Take the soil samples for the soil test after you have mixed in the compost.
When To Plant
Plant tomato plants when the soil and air temperature have warmed. The air temperature should be more than 60 degrees, and after all danger of frost has passed.
Planting
You can plant tomatoes from seed or from transplants. I find buying transplants is easier, but I can grow more varieties of tomatoes by starting them from seed.
Seeds

I start seeds indoors six to eight weeks before they need to be planted outside. I sow them in a seed starting tray or two-to-three-inch pots. Using a seed starting mix to grow them produces better results than using a general potting mix.
Plant the seeds ¼ inch deep and cover them with the seed starting mix. I get better results by setting the pots or tray on a germination mat set to 75-85 degrees.
When the seeds germinate, turn the mat down to 70 degrees. I thin the seeds to one tomato plant per pot or every two inches in the tray when they have two true leaves.


I make sure to keep the seed starting mix evenly moist but not soggy until I transplant my tomato plants outside.
Transplants
When buying transplants, I look for sturdy plants that are no taller than a foot and have a stem about the diameter of a pencil. The plants should be dark green.
Larger plants are likely rootbound and will not grow as well as plants the proper size. Do not buy plants with small tomatoes on them. These plants do not produce well.
Hardening Off Tomatoes
If you are transplanting tomato plants you have grown, be sure to harden them off to get them used to the outside before transplanting them. This takes about five days.
- On day one, set the tomato plant in the shade for two hours, sheltered from the wind. Then bring the plants back inside.
- On day two, set the tomato plants in the shade for four hours. Bring the plants back inside.
- On day three, set the plants in the sun for two hours, then place them in the shade. The plants will stay outside from now on.
- On day four, place the plants in the sun for four hours, then back in the shade.
- On day five, place the plants in the sun for six hours, then back in the shade.
- On day six, transplant the plants into the ground.
Remember to keep the soil evenly moist during this process or the plants will wilt and be damaged.
Transplanting Your Tomato Plants
Transplant your tomato plants in the afternoon on a cloudy day to give them the best start.
- Before transplanting your tomato plants, whether grown or bought, carefully remove the two lowest leaves from the stem with a knife.
- If the tomato plants are in a flat, run a knife between them to cut the roots into root balls.
- Water the plant well before transplanting.
- Dig a trench three to four inches deep.
- Place the root ball at the start of the trench.
- Lay the stem in the trench and gradually slope it upwards, supporting it with dirt, until the first leaves are about an inch above the soil line.
- Fill in the trench.
- If using peat pots, make sure the entire pot is covered with soil or it will wick moisture out of the root ball.
- Water the tomato plant.
- Fill in more dirt so the entire trench is filled.
- Repeat the watering and filling until the soil does not compact when watered.
- Install the tomato plant support (discussed below) now.
Plant indeterminate plants three feet apart in rows three feet apart.
Plant determinate plants two feet apart in rows three feet apart.
For everything you need to know about tomato spacing, read our article.
The number next to the name of the tomato variety in seed catalogs and on transplant tags is the number of days from transplant to harvest. If starting your plants from seed, add four to five weeks to this number.
Water
Water tomato plants with an inch of water once a week. If the soil dries out before a week passes, water the plants twice a week and give them an inch of water each time. Do not overwater tomato plants.
I have found that keeping the soil evenly moist is easier with an inexpensive moisture meter. Inconsistent moisture leads to smaller crops and blossom rot (discussed below).
Never get the stems, foliage, or tomatoes wet when watering. Give the water to the soil right at the root zone. Drip irrigation or a soaker hose is ideal. Overhead sprinklers lead to diseases.
Always water in the morning before ten o’clock. This lets the water soak in before the heat can evaporate it. In addition, if the plant does get wet, it will dry more quickly.
Temperature
Tomato plants are very sensitive to frost. I plant them outside only when all possibility of frost is over and the soil has warmed.
In the fall, when a freeze is forecast, I harvest all the tomatoes on the plant and let them finish ripening inside.
Tomato pollen becomes inactive when the temperature is above 90 degrees during the day. This means that tomatoes will grow and blossom in hot climates but will not set fruit until the temperature goes back down.
Most people in hot climates remove the tomato plants when it gets too hot for them to produce tomatoes and then start with new plants in the fall. Tomato plants can be nursed through the summer but seldom produce good yields in the fall.
Fertilizer
Getting a soil test before you start planting your tomato plants is the best thing you can do for them. I get one every two to three years. I then fertilize the ground according to the recommendations.
In the absence of a soil test, it is difficult to know how much of which nutrients you need.
I live in Dallas, Texas where my soil is high in phosphorous and potassium, so I add only nitrogen. I add ½ cup of 46-0-0 fertilizer at planting per 100 feet of row. If you do not have high phosphorous and potassium in the soil, use two to three pounds of 10-10-10 per 100 feet of row. Mix this fertilizer with the top two to three inches of soil.
When the first fruits are about one inch in diameter, I fertilize the plants with ½ cup of 46-0-0 per 100 feet of row. I place the fertilizer in a band about three inches from the plants along the row. Scratch it into the soil. Water the plants and fertilizer.
After this, I fertilize every two to four weeks with a fertilizer designed for tomatoes. You can read my article to find my thoughts on the best tomato fertilizers and how to use them.
Too much nitrogen will result in tomato plants that grow lots of foliage but have few blooms. Too much phosphorous and potassium can keep the plants from taking in calcium and iron. Never use “weed and feed” fertilizers in the vegetable garden as they will kill your plants. Never let fertilizer touch the plant as it will burn it.
Mulch
Mulch helps stabilize the soil moisture. It also keeps the number of weeds down near the tomato plant. I place a three-inch-deep layer of mulch around the tomato plant when I plant it. I don’t let the mulch actually touch the plant because it can cause rot. I prefer hardwood chips to straw for mulch. The hardwood chips last all season, but the straw can rot by the end of the season. I don’t use pine straw or pine bark because it can acidify the soil over several seasons.
If you live in a cold climate, wait until the soil warms up to apply the mulch around your tomato plant.
Supporting Tomato Plants
Since indeterminate tomato plants continue to grow all season, they can grow to be ten feet tall. The plant needs to grow up a trellis, or a tall tomato cage, so that it will be off the ground. Air can circulate and small ground insects such as rolly pollies do not eat the fruit. Supporting the vine reduces the risk of diseases to every part of the plant that is above the ground. Any support needs to be able to hold a large vine covered by tomatoes. Three bamboo stakes are probably not strong enough. Wood is often used. Metal is better because it can be sanitized between seasons and does not carry diseases and pests into the next season. If string or pea netting is used, it should be discarded at the end of the season. You should start out with a new string or netting each season. Not only does the string wear out, but it can also carry diseases into a new season. A pole six feet tall and an inch in diameter can be buried eight inches deep and will support the mature plant.
Determinate tomato plants grow a certain size and quit growing. They can technically be grown without support. In my experience, the plants produce more tomatoes, and the tomatoes are healthier when the plants are supported. A large tomato cage is usually more than adequate for support. The small tomato cages are not large enough to help much.
I place my support around the tomato plant when I transplant it into the ground. Waiting can cause a problem when you try to shoehorn a larger plant into a cage or onto a trellis, and branches can get broken. Use strips of cloth or something that will stretch as the tomato grows to tie your indeterminate plant to the support. Do not use wire as it will cut the stem when the stem starts to grow and kill the plant.
Pruning
Pruning is done on indeterminate plants. Do not prune determinate plants. Pruning improves air circulation and redirects the plant into producing more fruit instead of more foliage. You should prune your tomato plant once the first blooms are on it.
- Remove all the suckers from the ground level of the plant.
- Remove all the suckers growing in the area where the branch meets the stems but leave the suckers just below the fruit cluster and above.
Do this every ten to fourteen days but stop one to two weeks before the first fruits are ripe.
Diseases
Tomatoes get many diseases. Not all diseases happen in all places. I have written a whole article that covers all known tomato diseases.
Here are the most common diseases.
Early Blight (Alternaria linariae)
Early blight generally starts as brown lesions on the leaves. Concentric rings form around the lesion. Similar lesions form on stems. On fruit, the lesions will cover the whole fruit and cause it to drop. Leaves may drop and the stems may be girdled and die.
Early blight may be treated with a copper fungicide. Planting resistant varieties, keeping weeds removed, and watering properly will help prevent the disease. In addition, do not wet the plant when watering, and maintain proper spacing. Remove plant debris promptly and do not plant tomatoes where any related plant has been for three years.
Late Blight (Phytophthora infestans)
Late blight is a water mold and is especially bad during cold, wet weather. Small, dark, water-soaked lesions appear on the leaves. The lesion rapidly expands to cover the whole leaf. White mold appears on the margins of the spot on the bottom of the leaves. The leaves then shrivel and turn brown. Fruit gets shiny, dark, or olive, water-soaked spots that expand across the fruit.
You can treat late blight with a copper fungicide. To prevent it, do not get the foliage wet when watering. Water in the morning. Buy certified disease-free seeds and transplants. Plant resistant varieties. Keep weeds and plant debris out of the garden. Do not compost sick plants.
Septoria Leaf Spot (Septoria lycopersici)
Septoria leaf spot does not affect the fruit. Older leaves get numerous small dark brown spots with beige centers. Black spore-producing bodies are in the center. Affected leaves will turn yellow and fall off the plant. Defoliation reduces the size and number of tomatoes, and they are likely to get sunscald.
To treat the disease, use a copper fungicide. To prevent Septoria leaf spot, rotate your crops so nothing related to tomatoes grows in that spot for three years. Remove plant debris from the garden promptly. Do not use overhead irrigation.
Bacterial Spot (Xanthomonas spp.)
Bacterial spot causes numerous small, water-soaked lesions on the leaves. The center may dry out and fall out. There may be a yellow halo around the spots. The leaves drop off the plant, leading to lower yields, smaller fruit, and sunscald. Bacterial spot will attack green tomatoes but not ripe ones. Small, raised, scabby spots appear on the fruit.
Bacterial spot is hard to control because any movement of water between plants spreads it. Dirty tools and hands can spread it as well. Copper fungicides will give fairly good control. To prevent bacterial spot, do not use overhead irrigation. Clean up all plant debris as soon as possible. Do not compost sick plants. Buy only pathogen-free seeds and transplants.
Verticillium wilt (Verticillium dahliae)
Verticillium wilt causes yellow V spots on the leaves of tomato plants. The leaves become all yellow and then brown. Fruit gets sunscald when the leaves die. The oldest, lower leaves are most affected. Verticillium wilt seldom kills tomato plants but reduces their vigor and the number of tomatoes they have.
There is no treatment once the plant gets Verticillium wilt. Remove the plant and place it in the trash. To prevent verticillium wilt, plant resistant varieties. Once the fungus gets in the soil, it persists indefinitely, and any tomatoes planted there will get it unless they are resistant to it.
Fusarium wilt (Fusarium oxysporum)
Fusarium wilt causes the older leaves to drop and wilt. They lose the green color and become yellow. This often occurs on only one side of the plant at first. The whole plant wilts and dies.
There is no treatment for Fusarium wilt. Remove any plants with it and put them in the trash. To prevent the disease, plant resistant varieties. Use nitrate nitrogen instead of ammonium nitrogen as a nitrogen source.
Tobacco Mosaic Virus (Tobacco mosaic virus and Tomato mosaic virus)
Symptoms may vary but a mild mosaic develops on the leaves, and they may become fern-like or otherwise distorted. When the weather is cool, shoestrings may develop on the leaves. Tobacco mosaic virus causes pitting on the fruit.
There is no treatment for tobacco mosaic virus. To prevent it, do not handle tobacco products while working on your tomatoes. Sanitize your tools and wash your hands before handling tomato plants. Remove plant debris from the garden. Buy only disease-free seeds and plants.
Alternaria stem canker (Alternaria alternata f. sp. lycopersici)
Alternaria stem canker forms on stems, leaves, and fruit. Dark brown or black cankers form on the stem, enlarge, girdle the stem, and kill the plant. Dark brown to black dead areas of leaves between the veins are caused by a toxin the fungus produces. Dark brown sunken lesions with concentric rings appear on green fruits.
Many tomato varieties are resistant to Alternaria stem canker. Use a copper fungicide to control it.
Planting Resistant Varieties
Many tomato plant diseases can be prevented by planting resistant varieties. However, it is hard to keep up with which diseases a particular variety is resistant to. Cornell has a list of resistant varieties of many kinds of vegetables, including tomatoes, that is updated regularly.
Pests
While lots of pests want a bite of your tomato plants and fruit, not all pests are in any one place. Below is my list of the most common pests and how to treat them:
Cutworms (Black cutworm: Agrotis ipsilon and Variegated cutworm: Peridroma saucia)
Cutworms come in different colors and patterns but are smooth-skinned. They curl up into a C when disturbed. They stay in the soil or under a rock during the day and come out during the night. Cutworms may cut off the stems of young plants and kill them. They will also make holes in fruit that touch the soil.
To treat cutworms, spray the plant with Bacillus thuringiensis or spread diatonomous earth around the plant. To prevent cutworms, keep weeds pulled and remove plant debris promptly. Till the garden under before the winter to bury the pupa and keep them from overwintering.
Flea Beetles (Epitrix hirtipennis and others)
Flea beetles are small dark beetles that have overdeveloped hind legs and jump like fleas. They chew holes in the leaves. They can kill small tomato plants by eating the leaves. Older plants are more resistant to problems. On rare occasions, flea beetles will chew on the fruit and damage it. The problem is more cosmetic than serious, however.
If you see flea beetles, you can use pyrethrin to kill them. Pyrethrin will kill pollinators, too, so spray it in the evening and do not get it on the flowers to reduce their mortality. To prevent flea beetles, rotate crops and do not replant with tomatoes for two years.
Tomato Hornworm (Manduca quinquemaculata)
The tomato hornworm is a green caterpillar with eight chevron shapes on the side and a horn on the back end. The adult moth lays single white to light green eggs on a leaf. The tomato hornworm eats fruits, flowers, and leaves. It can skeletonize the leaves and scar fruit.
Hand-picking is the easiest way to deal with these pests. Drop them in a jar of soapy water and they drown. If the population is getting out of control, spray the tomato plants with Bacillus thuringiensis. Prevent tomato hornworms by rotating crops and not planting anything they eat for two years. Tilling the dirt before each season will destroy the pupae.
Colorado Potato Beetle (Leptinotarsa decemlineata)
Colorado potato beetles are yellow with ten black stripes on the back and black spots on the head and thorax. The larvae are brick-red grubs with black heads and black spots along the side. As they get older, they turn orange, tan, or pink. The eggs are orange and spherical and are laid on the underside of the leaf in clusters of 20-60 eggs. These beetles chew leaves, the area where leaves and fruit attach to the stem and fruit. They will defoliate tomato plants, which leads to sun-scalded fruit. The beetle can kill young plants.
Crushing eggs, larvae, and adults is the best way to kill them. You can also pick the larvae and adults off the plant and drop them in a jar of soapy water to kill them. Spinosad and neem oil are effective at killing the beetles as well. To prevent them, put three inches of mulch around the tomato plants. Till between seasons. You can use floating row covers, a special fabric fitted over hoops, to exclude the beetles until the plants flower.
Potato Aphids (Macrosiphum euphorbiae)
Potato aphids are small, pear-shaped insects that also eat tomatoes. On tomato plants, they are usually red. However, they may also be pale green or a mix of red and green. They suck the sap out of the leaves, leaving empty spots.
Low numbers of aphids are not a concern. A blast of water will usually knock them off of the plant. If leaves become distorted and sooty mold grows on the honeydew aphids excrete, use neem oil or insecticidal soap to remove them. To prevent aphids, do not overfertilize with nitrogen. The lush green growth nitrogen causes attract the aphids.
Root-Knot Nematodes (Meloidogyne spp.)
Root-Knot nematodes are tiny worms that spend most of their lives in galls. They look like tiny pearls which can be seen in galls when they are opened. Root-Knot nematodes cause galls on the roots, making it difficult for the plant to take up water and nutrients. Infected plants are less vigorous, may appear yellow, and wilt in hot weather. They also respond poorly to fertilizer.
There are no chemical controls available to home gardeners. To prevent problems, plant resistant varieties of tomato plants. Keep weeds out of the garden as some are host plants.
Cabbage or Alfalfa Looper (Trichoplusia ni or Autographa californica)
Loopers are pale green caterpillars that move by arching their backs. Loopers feed on leaves, not fruit.
Loopers are usually kept in check by natural enemies. Hand-picking them and dropping them in a jar of soapy water is an effective control. If the loopers are causing enough damage that the fruit is getting sunburned, spray the plant with Bacillus thuringiensis.
Tomato Fruitworm (Helicoverpa zea)
The adult tomato fruitworm is an olive moth. They lay white eggs that turn reddish brown within twenty-four hours. The larvae feed on the tomato. The newly hatched larvae are yellowish-white with a brown head. Older larvae turn greenish yellow to brown or black with paler stripes along the side. The larvae enter the stem end of the tomato and live in the tomato. The tomato will ripen prematurely. It will be hollow with caterpillar skins and feces.
When eggs and very little caterpillars appear, spray the plant with Bacillus thuringiensis or Spinosad to kill them.
Stink Bugs
Several special of stink bugs that infest tomatoes:
- Consperse stink bug (Euschistus conspersus)
- Redshouldered stink bug (Thyanta custator accerra)
- Say stink bug complex (Chlorochroa sayi and Chlorochroa uhleri)
- Southern green stink bug (Nezara viridula)
There are several species of stink bugs that infest tomatoes. Adult stink bugs are shield-shaped and either brown or green. Some have additional markings. Larvae resemble adults but do not have wings. The eggs are drum-shaped with circular lids and are laid in clusters. The damage on green fruit looks like dark pinpricks and is surrounded by yellow areas that do not ripen. Inside, the fissure caused by the stinkbug turns corky and is not good to eat. In addition, some stink bugs have yeast on their mouthparts that causes secondary rotting of the fruit.
To prevent stinkbugs, destroy weeds around the garden they may use to overwinter. Insecticidal soap will kill larvae and adults. Crush the eggs to prevent hatching.
Tomato Psyllid (Bactericera cockerelli)
The tomato psyllid is a small insect about 1/8th of an inch long that looks like a cicada. The nymphs are scale-like with flattened bodies that are yellowish-green to orangish with red eyes. As the nymphs grow, they are green with fringe hairs and wing buds. The nymphs and possibly the adults inject a toxin when feeding. New transplants will die, while older plants will be stunted, have chlorosis, and curling of the leaves. If they produce fruit, they will have lots of small fruit that is too small to be of much use. Psyllids also produce lots of white, powdery honeydew that covers fruit and leaves. It can lead to sooty mold.
You can kill tomato psyllids with Spinosad, which is allowed in organic gardening. The only preventive measure you can take is rotating your crops and not planting anything related to tomatoes there for three years before planting your tomatoes.
Whiteflies
- Bandedwinged whitefly (Trialeurodes abutilonia)
- Greenhouse whitefly (Trialeurodes vaporariorum)
- Sweetpotato whitefly (Bemisia tabaci biotype B)
Whiteflies are tiny yellow insects with white wings. They are hard to see with the naked eye, but if you bump the tomato plant, the whiteflies will burst up in a cloud. When the nymphs are first born, they have legs and are called crawlers. The next and subsequent nymph stages do not have legs and are like scale insects. Whiteflies cause damage by feeding which causes the leaves to yellow and curl. They also produce honeydew, which sooty mold colonizes. Feeding on fruit causes the fruit to ripen unevenly. The greenhouse whitefly transmits tomato infectious chlorosis virus which ruins the leaves. Sweetpotato whiteflies transmit the tomato yellow leaf curl virus, which causes the leaves to yellow and curl, and the tomato plant has few tomatoes that are not good quality.
To prevent whiteflies, remove plant debris promptly. Rotate crops so nothing whiteflies eat is grown in the same spot for three years. Using silver or aluminum-colored mulches in the first few weeks after transplanting repels adult whiteflies. Use insecticidal soap or neem oil to kill them. Some formulations are allowed in organic gardening.
Tomato Pinworm (Keiferia lycopersicella)
Tomato pinworms start out light-colored and appear smooth. Later nymphs are usually found in the fruit. They appear gray or yellowish with an irregular band of red or purple on each segment. Nymphs do mine-type damage on the leaves but do most of their damage to the fruit. They enter and eat out of the middle.
To prevent tomato pinworms, remove all plant debris promptly. Remove weeds in the tomato family. Rotate crops so do not plant tomatoes or related plants for three years in the same place. There is not really a homeowner-approved treatment for these pests.
Blister Beetles (Various species)
Blister beetles can grow to ½ to ¾ inch. They have long, narrow bodies that can be black, brown, or gray. These beetles strip the foliage from tomato plants, which can kill them. If the plant survives, fruit production is lower, and the fruit is smaller. Blister beetles produce cantharidin, which causes water-filled blisters on human skin.
To treat blister beetles, you can hand-pick them and drop them in a jar of soapy water. Wear gloves when doing so to protect your hands. You can also spray tomato plants with a broad-spectrum insecticide like Permethrin. Be aware these also kill pollinators. These insecticides are not allowed in organic gardening. Spinosad and neem oil can reduce feeding behavior in one to two days and are allowed in organic gardening.
Thrips
- Onion thrips (Thrips tabaci)
- Western flower thrips (Frankliniella occidentalis)
Thrips are long, slender insects with fringed wings. They are so small you need a hand lens to see them. Their primary damage is giving the tomato plant Tomato spotted wilt virus. They also feed on the plant which can lead to distorted plant growth, deformed flowers, and silvery spots on the leaves with black feces in them.
To prevent thrips, avoid planting tomatoes next to onions and garlic, which draw thrips. Spinosad can be sprayed on tomato plants to control the thrips.
Physiological Disorders
Some problems in tomato plants are not caused by diseases or pests. They are physiological disorders. Here are the most common problems.
Blossom End Rot
Blossom end rot is caused by a lack of calcium in the fruit. The Blossom end gets a water-soaked lesion that rots. Sometimes it takes up half the fruit. Secondary rot can ruin the whole tomato. This problem is caused by inconsistent watering. There may be plenty of calcium in the soil, but the fruit cannot take it up without water.
To prevent this disorder, keep the soil evenly moist throughout the life of the tomato plant. Excess nitrogen fertilizer will lead the plant to produce too much foliage which takes the available calcium before the fruit can, so do not overfertilize.
You can read more about this disease in my article here.
Catfacing
Catfacing is the cracking or malformation of tomatoes at the blossom end. It is caused by several things. Inconsistent moisture levels will cause it, especially dry periods followed by rain during the ripening of the fruit. Periods of very fast growth in high temperatures and high moisture can also cause it. Finally, it can be caused by large differences in day and night temperatures.
To prevent it, plant resistant varieties. Keep the plants evenly moist during their life of the plant.
Growth Cracks
Growth cracks happen at the stem end when rapid changes in moisture make the tomato grow faster than its skin can expand. Usually, dry weather is followed by heavy rains. Some cracks are concentric rings, while others radiate out from the stem.
To prevent growth cracks, plant resistant varieties. If you find a crack, harvest the tomato immediately and ripen it indoors. It will rot outside. If a tomato has a sour odor or oozes fluid, throw it away. It can make you sick if you eat it.
Leaf Roll
Leaf roll starts on the lower, older leaves. The leaves curl inward, then roll inward lengthwise. The leaves become thickened and leathery but stay green. The causes are varied but can include: excessive moisture and nitrogen, insufficient phosphorus, heat, drought, severe pruning, root damage, early planting, and transplant shock.
To prevent leaf roll, properly harden off transplants, wait until the weather is warm before transplanting tomato plants, mulch around the plants, maintain a consistent moisture level, avoid overfertilizing with nitrogen, add phosphorus if needed, and avoid excessive pruning and root damage.
Sunscald
Sunscald causes tomatoes to become brown and leathery. It is most often caused by defoliation as the leaves shade the fruit from the sun.
To prevent sunscald, maintain a healthy plant, and treat diseases and pests that defoliate the plants early. You can spread shade cloth over fruit that is exposed to protect them.
Harvesting and Storage
I like vine-ripened tomatoes. I use bird or squirrel netting to keep critters away so I can get any ripe tomatoes. I pick the tomatoes when they are red but still a little firm. Some varieties will drop when ripe, but I pick them just before they drop. Other varieties should be cut from the vine with sharp scissors or a sharp knife. Leave as little stem on the tomato as possible when cutting them off the vine unless they grow in clusters. In that case, cut the stem at the top of the cluster.
Green tomatoes that have started to ripen can be ripened inside. Place them in a warm area on a counter so they do not touch each other.
Uncut tomatoes may be stored on the counter for several days. Placing them in the refrigerator makes them mealy and washes out their flavor.
Care of Specific Types of Tomatoes
Here are some tips for taking care of specific types of tomato plants to get the best yield.
Growing Tomatoes in Containers
Determinate tomato plants are great for containers. They usually only get three feet or so tall. Look for labels like “bush,” “patio,” and “compact” in seed catalogs. These tomato plants need to be staked or caged when grown in pots. You can grow them in a large hanging basket and let the vines trail over the edge.
Indeterminate tomato plants can grow to be six feet in length and need lots of room. They are hard to grow in containers because they become very top-heavy.
To grow tomato plants in pots, you will need a pot that is twenty inches in diameter and at least two feet deep. A five-gallon bucket works well. In either case, you will have to make sure the pot or bucket has drainage holes. If they do not, drill them in the bottom of the pot or about ½ inch up from the bottom of the bucket. Anchor your pot well to keep it from turning over as the plant grows large and heavy with tomatoes.
For the soil in a container, use a potting mix developed for vegetables. You can check out my article if you’re looking for potting mixes specifically formulated for tomato plants. When filling the pot with potting mix, stop an inch below the rim of the container. This allows water to pool on top of the soil and soak in rather than run off.
The main difference between container-grown tomato plants and plants grown in the ground is that container-grown plants need more water and fertilizer. The limited amount of soil in a pot dries out quickly. You may have to water the pot as often as twice a day in a hot climate to keep the soil evenly moist. When you water, keep watering until water runs out the drainage holes of the pot or bucket.
Nutrients are quickly used up by the tomato plant. You will need to use a liquid fertilizer every two weeks to add more nutrients back into the soil.
You can get more great tips about growing tomato plants in pots in my article, “Growing Tomatoes in Pots – How to Grow Tomatoes in Pots?”
Cherry Tomatoes
Cherry tomatoes are round and ¾ to 1.5 inches in diameter. Cherry tomato varieties are varied, some are determinate and some are indeterminate. Even the indeterminate plants don’t get as large as full-sized tomato vines. Cherry tomatoes make a great first tomato to grow. They are good right off the vine and can get kids excited about gardening. In general, you grow cherry tomatoes just like you grow full-sized tomatoes. You can get more details about growing cherry tomatoes in the article “How to Grow Cherry Tomatoes.”
Grape Tomatoes
Grape tomatoes are just like cherry tomatoes except the fruit is oblong and shaped more like a pear. Grow them just like cherry tomatoes for a refreshing snack in every bite.
Heirloom Tomatoes
Heirloom tomatoes are tomatoes that are open-pollinated, non-hybrid, and have been in circulation since before 1940. Many of them have been passed down from generation to generation by families. Some were developed commercially but were not patented.
Heirloom tomato plants are not as resistant to diseases as hybrids, so they may not do as well as modern hybrids. However, they are grown just like the more modern tomato plants.
The yields from heirloom tomato plants are lower than hybrid tomato plants. You will need to plant more plants (five to seven per family for indeterminate, ten to twelve per family for determinate) to get the same number of tomatoes.
If you decide to grow heirloom tomatoes this year, check out our favorite type of heirloom tomatoes.
Hybrid Tomatoes
Hybrid tomato plants are crosses of two varieties to improve both of them. They have “hybrid vigor” which means they grow better and produce more than their parents. However, the seed does not breed true, so you have to purchase seeds or plants each year. Hybrid seeds tend to be more expensive than open-pollinated seeds, too.
You will need three to five plants per family of indeterminate plants and seven to nine plants per family for determinate plants.
Beefsteak Tomatoes
Beefsteak tomatoes are slicing tomatoes. They are usually indeterminate and grow all season. For this reason, they need three feet between them and the next plant all the way around. They also require support. Beefsteak tomatoes have tomatoes all season.
Roma Tomatoes
Roma tomatoes, also called paste tomatoes, are usually determinate tomatoes used for tomato paste, tomato sauce, and canned tomatoes. All the tomatoes are ripe within a one-to-three-week period, so it is easy to process them in a batch.
Grafted Tomatoes
When grafted tomatoes first came out, I thought they were a marketing gimmick. However, research has shown that they produce around eleven percent more than ungrafted tomatoes. The research is primarily about farmers growing fields of tomatoes and not individuals growing a few for their garden, however.
The advantage of grafted tomatoes is that you can grow a rootstock that is very disease resistant but may not have great tomatoes and graft on a variety (the scion) that is very tasty but does not have much disease resistance. You can grow heirloom tomatoes this way.
One caution is that the graft must be at least two inches above the ground so the scion stem does not put down roots. If that happens, the disease will bypass the rootstock and attack the scion part of the plant.
You can obtain grafted tomatoes from Home Depot, Territorial Seed Company, and a few other places. You can get grafting supplies and instructions from Territorial Seed Company, Johnny’s Seeds, and other online dealers.
Final Verdict
In conclusion, tomato plants are not hard to grow but do require sunlight, evenly moist soil, and lots of fertilizer. In return, you get slicing tomatoes, paste tomatoes, or cherry and grape tomatoes. You can grow heirloom tomatoes or hybrid plants. There are diseases to be wary of as well as pests that attack the tomato plant and fruit. Many varieties of tomatoes have some disease resistance to common diseases. Finally, if you want to grow heirloom tomato plants, you can graft them onto disease-resistant rootstock.